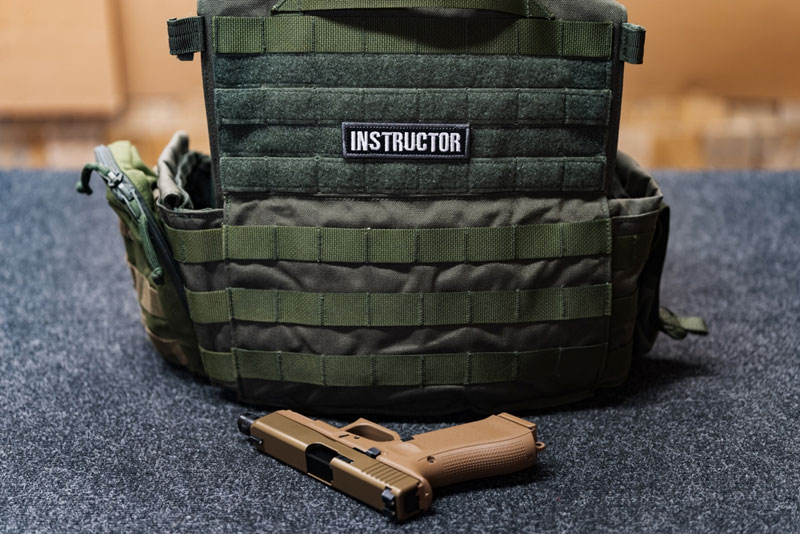
How To Attach Patches To Plate Carrier

Military personnel, law enforcement officers, and tactical enthusiasts commonly attach patches to plate carriers. Patches personalize gear and serve functional purposes, such as displaying identification, rank, unit, or morale symbols. Properly attaching these patches ensures they stay secure during rigorous activities and harsh conditions.
Whether new to tactical gear or looking to optimize your setup, this guide will walk you through the steps to attach patches to your plate carrier efficiently and securely. From selecting the right patches to understanding the various attachment methods, we cover everything you need to know to customize your plate carrier to meet your needs and preferences.
Why Add Patches To Your Plate Carrier?
Before we dive into the process of attaching patches, it’s important to understand why patches are so popular in the first place. Patches are not just for decoration-they serve a variety of purposes and can be used to:
Show Team Affiliation or Rank: Many tactical units use patches to display team names, ranks, or specific roles within the team. Sheriff badges and military emblems are commonly displayed on uniforms to signify authority.
Enhance Style and Morals: Morale patches add fun or humor to a serious setup. From funny quotes to symbolic emblems, these patches boost the morale of the wearer and create a sense of camaraderie.
Customization: Patches allow you to personalize your gear. Whether a custom PVC patch with your logo, an embroidered emblem, or a laser-cut design, your plate carrier essential gear can express your unique style.
Practicality: Some patches, such as flags or identifiers (like blood-type patches), provide functionality beyond aesthetics. These patches can make your gear more functional in the field.
Steps To Attach Patches To Plate Carrier
When attaching patch accessories to your plate carrier, ensure the surface is clean and dry, promoting better adhesion. Next, decide where to place each patch, considering its size and shape for best visibility and utility. Utilizing Molle Strips for adhesive application can make the process seamless, but pressing firmly to eliminate air bubbles is essential. Rubbing the back of the patch with a metal spoon guarantees a tight seal. To further secure the patches, consider stitching them with strong thread. Are you curious about ensuring perfect alignment? Are you curious about your ability?
Choosing The Right Patches
When selecting the appropriate patches for your plate carrier, consider the size and shape to guarantee a perfect fit. Not all patches are created equal, and ensuring they match the contours of your carrier will save you a lot of hassle.
Look for patches with hook-backing; these will stick easily to the loop surface on your plate carrier, making attachment quick and secure. It’s really good to choose patches that reflect your personal style, unit affiliation, or role. Whether you’re a medic or security personnel or want to show off some flair, the right patch can communicate much about you.
Durable patches made from high-quality materials are a must. They’ll withstand the wear and tear of everyday use and extreme conditions. Versatility is key, so pick easy patches to attach and remove. You patches that are easy for them to fit different scenarios or personal preferences.
Preparing The Plate Carrier
Before attaching your chosen patches:
- Make sure your plate carrier is clean and dry.
- Start by inspecting the airline for any dirt, dust, or debris.
- Use a damp cloth or mild detergent to clean the surface, making sure to reach all crevices.
- After cleaning, let the operational plate carrier dry completely to guarantee a strong attachment for your patches.
Next, consider the positioning of your patches. Identify the desired placement areas on your plate carrier. Think about the size and shape of each patch and how they’ll fit into the carrier’s design. Choosing spots that won’t interfere with the carrier’s functionality is crucial. Ensure the patches are visible and accessible but don’t obstruct critical components like straps or pockets.
When positioning your patches, check their compatibility with the plate carrier’s material. Most patches use hook-and-loop fasteners, so make sure your carrier has corresponding loop panels. If your patches use adhesive, confirm that the surface is suitable for a strong bond.
Attaching The Patches
Attaching the patches to your plate carrier involves a few straightforward steps to guarantee they stay secure and functional. First, consider the best patch placement on your plate carrier. Look for flat, accessible areas where the patch will be visible and easy to reach.
Once you’ve decided on the placement, get your Molle Strips ready. Peel off the backing of the adhesive strips and carefully align them with the shape of your patch. This step is important for ensuring the adhesive application is effective. Press firmly to secure the patch onto the plate carrier, ensuring no air bubbles or loose spots.
For added security, rub the back of the patch with a metal spoon, applying firm pressure with your thumb to achieve a tight seal. To enhance patch durability, you’ll need to cure the adhesive. Place ier in a clothes dryer on low heat for about 15 minutes.
This helps set the adhesive, ensuring your patch remains firmly attached even under rigorous tactical gear conditions. These steps will give you a secure and durable patch attachment ready for any mission or activity.
Securing With Stitching
While adhesive strips provide a quick solution, securing patches with stitching offers enhanced durability and reliability for your right plate carrier. To start, choose a strong, durable thread like nylon or polyester. These materials withstand wear and tear, guaranteeing your patch stays firmly in place.
Before diving into the stitching process, ensure the patch placement is proper. Align the patch accurately, centering it as desired. This step is essential for maintaining a professional look. Begin the stitching by knotting the thread securely; this knot will prevent the thread from unraveling during use.
A simple running stitch may suffice for stitching techniques, but a more secure backstitch offers added strength. Thread your needle and start stitching around the edges of the patch. Avoid stitching through the plate carrier material, which could compromise its integrity. Instead, focus on stitching through the patch’s edge and any backing material it has.
As you sew, maintain alignment accuracy to keep the patch straight and even. Finish by tying a secure knot at the end of your stitching. This ensures the thread remains tight and the patch stays firmly attached, providing a long-lasting, secure attachment.
Ensuring Proper Alignment
How can you guarantee that your patch is perfectly aligned for a professional look?
- Start by determining the desired patch placement on your plate carrier. Before attaching, lay the patch on the chosen spot and use alignment techniques to confirm accuracy. Grab a ruler or measuring tape to check the distance from the edges, ensuring visual symmetry with other elements on the carrier.
- Next, double-check the alignment from different angles. Stand back and view the patch from the front, sides, and even from a slight distance to make sure it’s not crooked.
- It is important to consider the patch’s size and shape; larger patches may require more meticulous adjustments, while smaller ones might need finer tweaking.
- Take your time to adjust and re-align the patch until it’s just right. A hasty placement can lead to a crooked and unprofessional appearance. Remember, patience here pays off in the form of a clean, sharp look.
Where To Buy Patches For Your Plate Carrier
Many options are available online if you’re looking to buy patches or the best accessories for your plate carrier. Popular sites like Chase Tactical, Instagram, and tactical gear retailers offer various patches, from military insignias to custom badges and PVC patches. Whether you’re looking for customized logos or a specific patch collection, many options are available to suit your needs and style.
Additionally, a few companies offer gift cards, so you can buy patches and other accessories to give to someone who loves tactical gear. For the best prices on high-quality patches, check out websites with a wide selection and look for their sales.
Conclusion
You have everything you need to attach patches to your plate carrier like a pro. By carefully buying your carrier and using Molle Strips, you guarantee a strong bond.
Stitch the patches for extra security, and always double-check your alignment. These steps ensure a professional, ready-look session or display for your plate carrier.
Frequently Asked Questions
How to Adhere a Patch?
You can use adhesive sprays, iron-on methods, or Velcro backing to adhere to a patch. Align the patch, press firmly, and make sure it’s secure. For iron-on, heat the adhesive, and for Velcro, attach both sides.
How to Attach Patches Without Sewing?
To attach patches without sewing, use Velcro backing for easy attachment. Alternatively, opt for adhesive strips. Press firmly to guarantee a tight seal for secure placement—no stitching is needed!
How to Apply a Peel and Stick Patch?
To apply a peel-and-stick patch, use the peel technique: remove half the liner, align the patch, and peel the rest. Guarantee strong adhesive strength by pressing firmly and curing in the dryer to guaranteermly and curing in the dr
How Do You Glue Patches to Fabric?
Add fabric glue to the pa:
- Apply the glue patches to the fabric.
- Use bonding techniques like pressing firmly.
- For adhesive options, consider washable fabric glue for stronger bonds.
- Let it dry completely before washing or wearing.


